Tech News, Magazine & Review WordPress Theme 2017
  • Home
  • VPS Plans
  • VPS Locations
  • Affiliates
  • Blog
  • Contact Us
  • Login
  • Register
No Result
View All Result
OneVPS Blog
  • Home
  • VPS Plans
  • VPS Locations
  • Affiliates
  • Blog
  • Contact Us
No Result
View All Result
OneVPS Blog
No Result
View All Result
Home Knowledge Base

How to connect to Linux from Windows using PuTTY

In This Tutorial We Will Show You How To Use PuTTY To Connect To Your Linux VPS From Windows 10, 8, And 7.

2 min read
How to connect to Linux from Windows using PuTTY
Share on FacebookShare on Twitter

If you are using other device/system please search our Knowledge Base to find appropriate tutorial for your system.

PuTTY is a free and open-source terminal emulator and network file transfer application. It supports several network protocols, including SCP, SSH, and Telnet. In this tutorial, we’ll be using SSH to connect to your VPS.

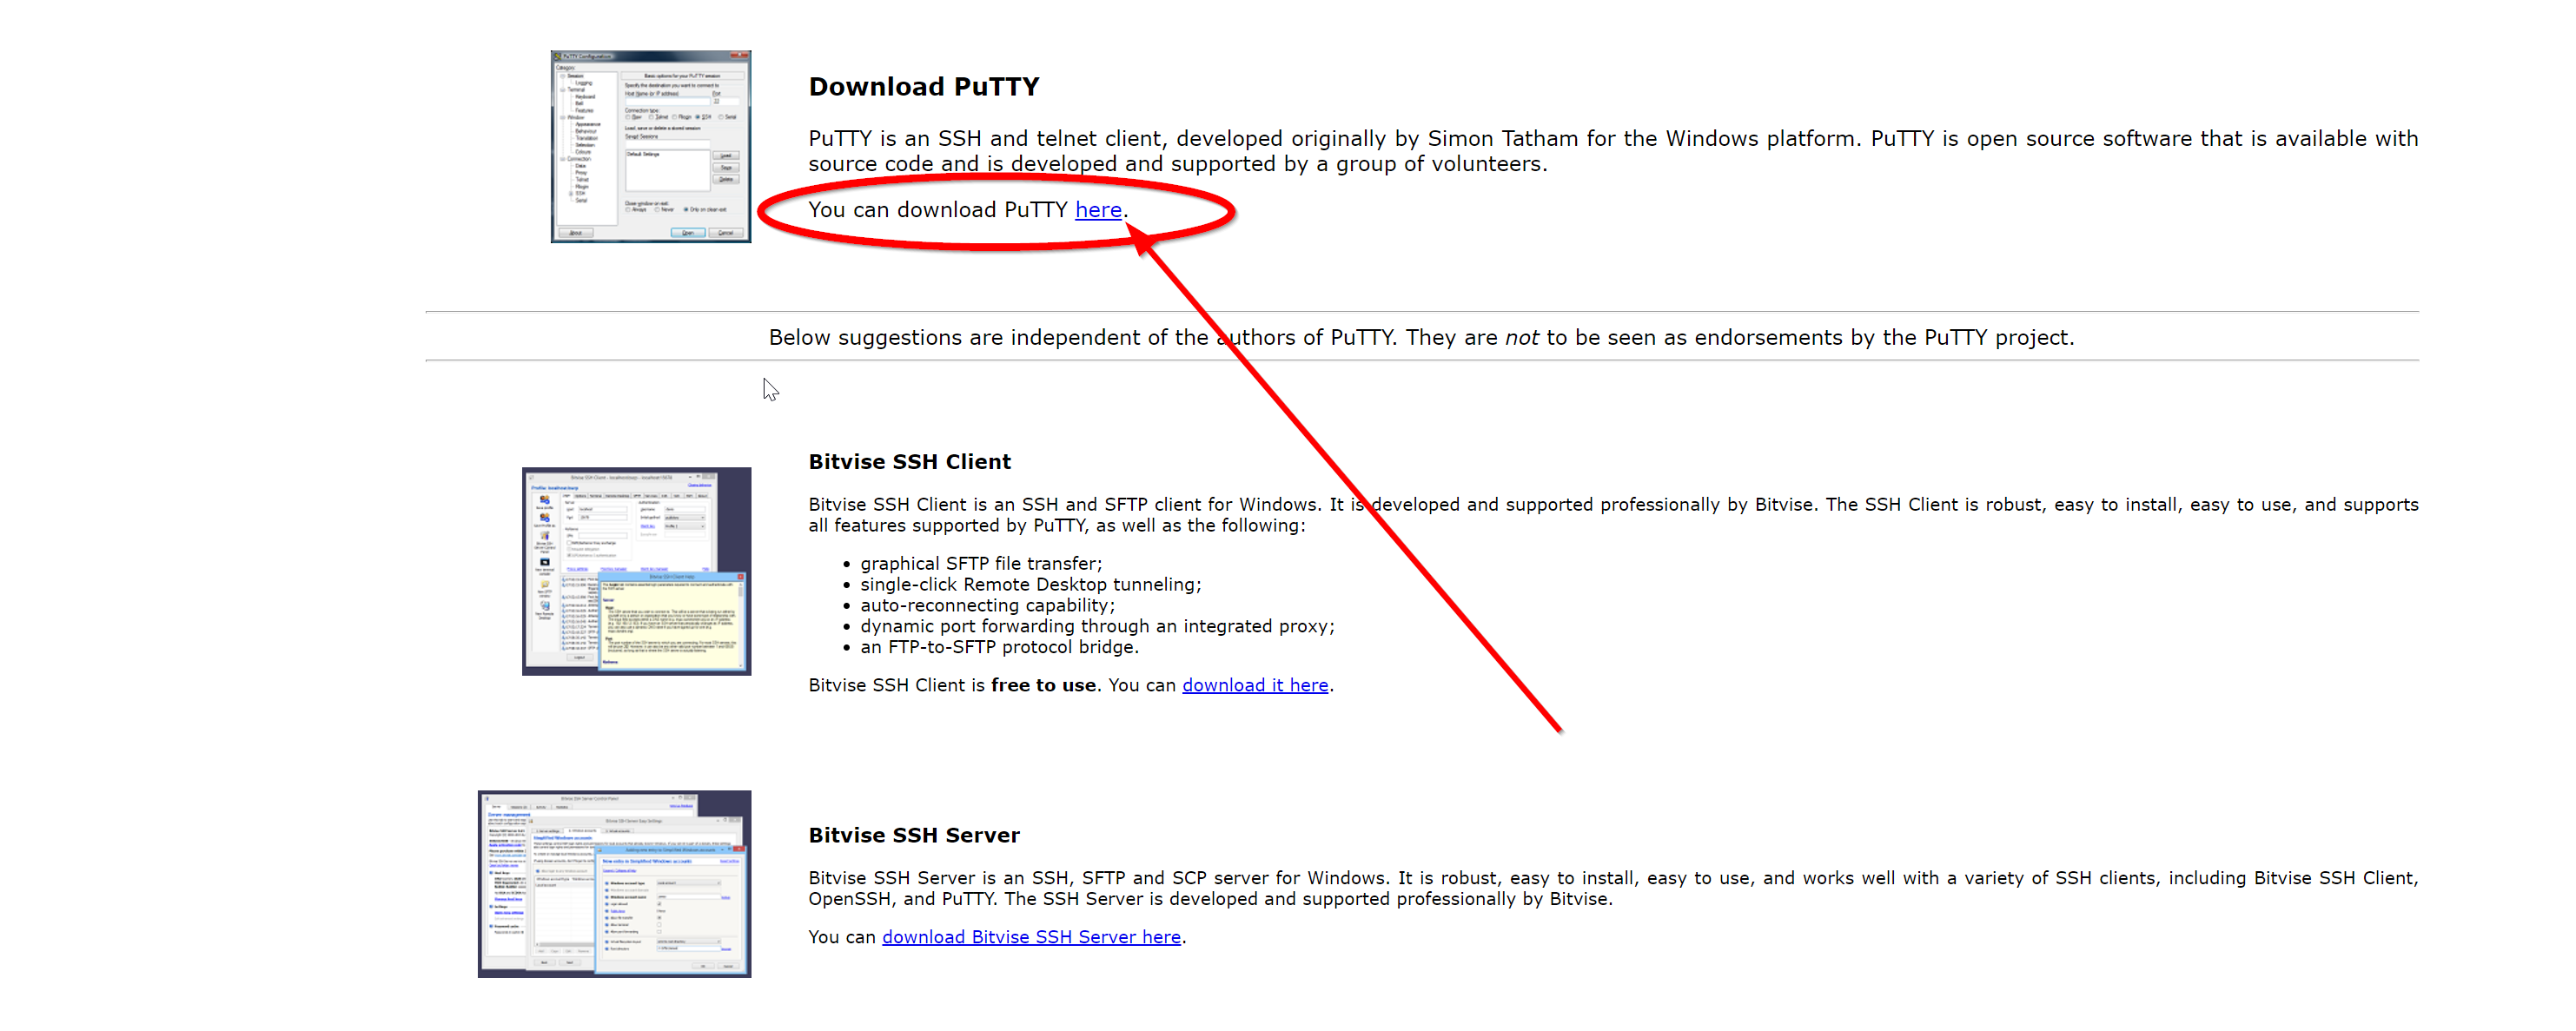
To download the latest version of PuTTY, use the following URL:

https://www.putty.org/

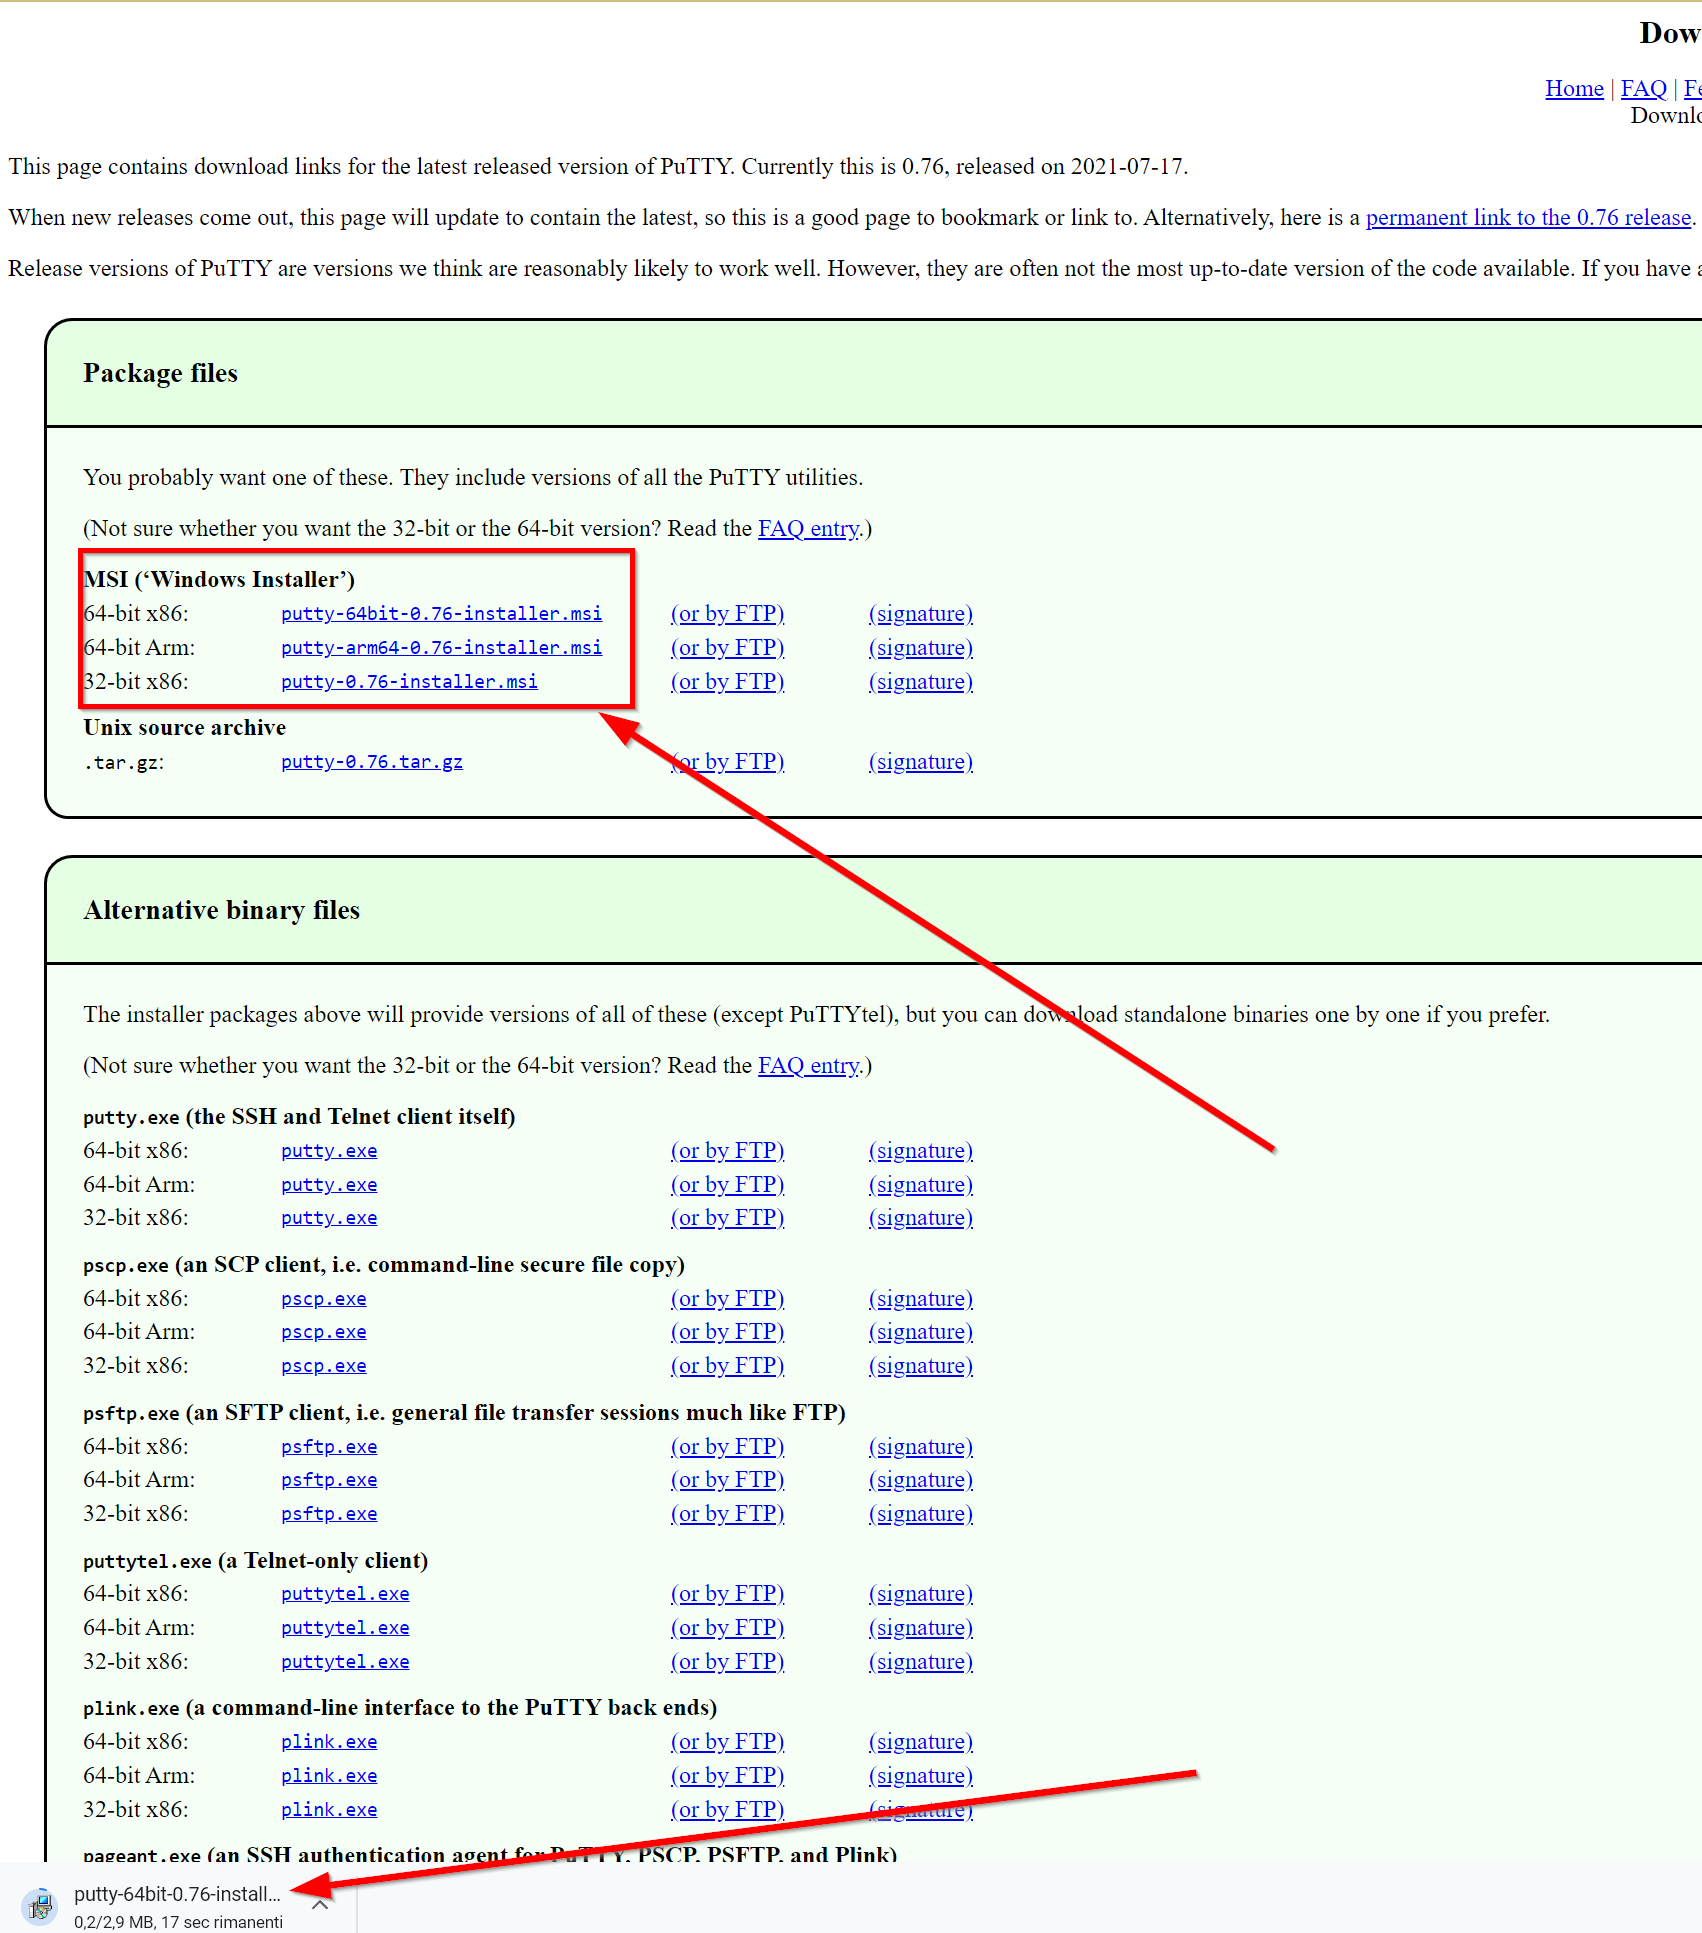
Choose the appropriate 32bit or 64bit installer.msi file for your operating system. To find out if your version of Windows is 32bit or 64bit, you can open the System menu by clicking the Windows Start button or icon, and typing System.

Here are the steps on how to do that:

1 – Go into https://www.putty.org/ and download PuTTY by clicking in the download link.

2 – Select the right version of PuTTY for your OS and download it.

3 – Run the downloaded file by clicking on it. Then go throught the installation process until it’s finished.

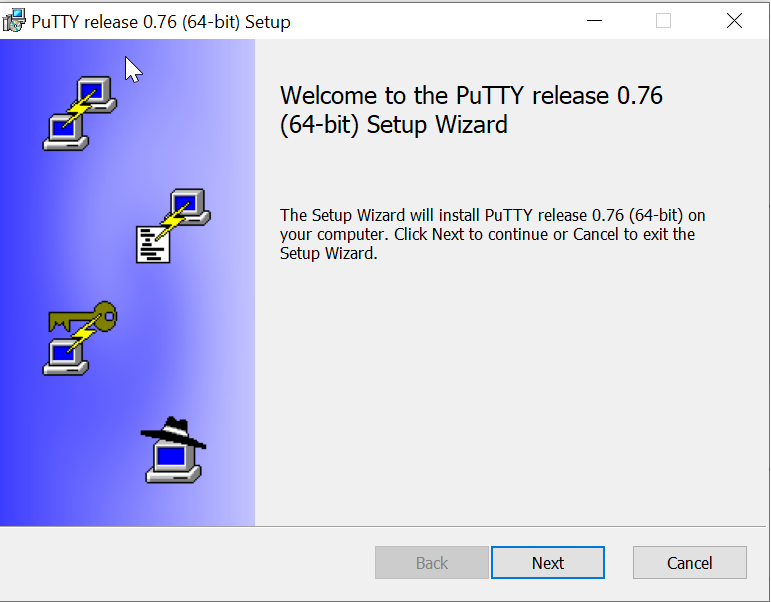
When you have completed the installation, open the application from the desktop icon or from the application listing in the Windows Start Menu.

Once opened, you should see the Session Configuration interface. Enter the IP address and port (OneVPS uses 22122 as the default SSH port) and choose SSH as the connection type:

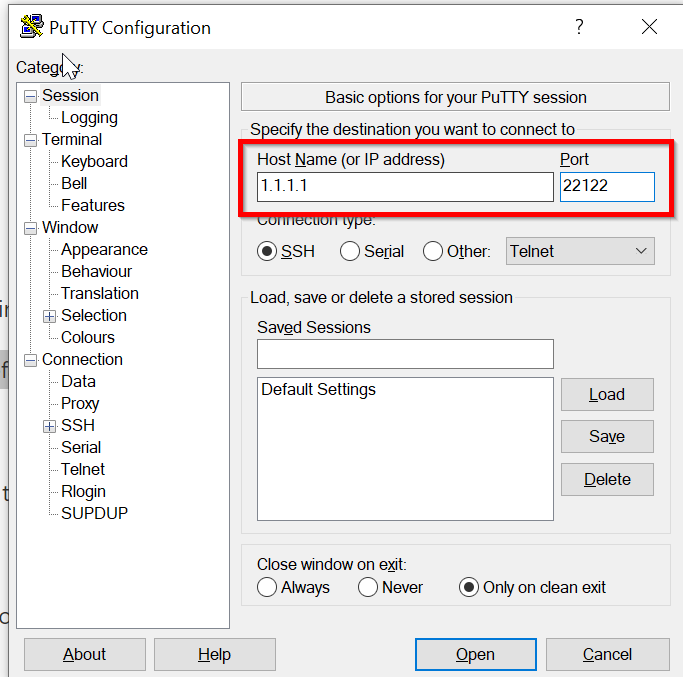
To save your session, choose a session name (ex: My VPS) in the text field under “Saved Sessions” and click save. You can open this session by double-clicking on the session name from the list.

On the first connection you will be prompted to accept the server’s host key by clicking “Yes”.

You will then see a black terminal screen and be prompted to “Login as:”. Choose “root” as the user and then enter your password.

You should now be presented with the command prompt for your VPS.

Related Posts

Computers

Connecting with OpenVPN through your VPS – Windows

October 26, 2021
How to properly disconnect from RDP Session
Knowledge Base

How to properly disconnect from RDP Session

May 27, 2020
How to connect from Windows 8
Windows Guides

How to connect from Windows 8

May 27, 2020
Next Post
How to manage iptables firewall in Linux

How to manage iptables firewall in Linux

Recommended.

How to change a Cloud VPS’ password.

September 15, 2021
Dedicated vs VPS Hosting

Dedicated vs VPS Hosting

February 15, 2019

Trending.

How to Hack a VPS

How to Hack a VPS

February 15, 2019
How to properly disconnect from RDP Session

How to properly disconnect from RDP Session

May 27, 2020
Advanced VPS Control

Advanced VPS Control

May 27, 2020
OneVPS Blog

OneVPS.Com - The Only VPS You'll Ever Need.

© 2012-2020 Think Huge Ltd. Trademarks And Brands Are The Property Of Their Respective Owners.

Address: Level 26, Beautiful Group Tower, 77 Connaught Road, Central, Hong Kong

Quick Links

  • Home
  • VPS Plans
  • VPS Locations
  • Affiliates
  • Blog
  • Contact Us

Other links

  • VPS Knowledgebase
  • About OneVPS
  • Privacy
  • Terms
  • Contact Us
  • About
  • Affiliates
  • FAQ

© 2012 - 2020 Think Huge Ltd Trademarks And Brands Are The Property Of Their Respective Owners.

No Result
View All Result
  • Home
  • VPS Plans
  • VPS Locations
  • Affiliates
  • Blog
  • Contact Us

© 2012 - 2020 Think Huge Ltd Trademarks And Brands Are The Property Of Their Respective Owners.